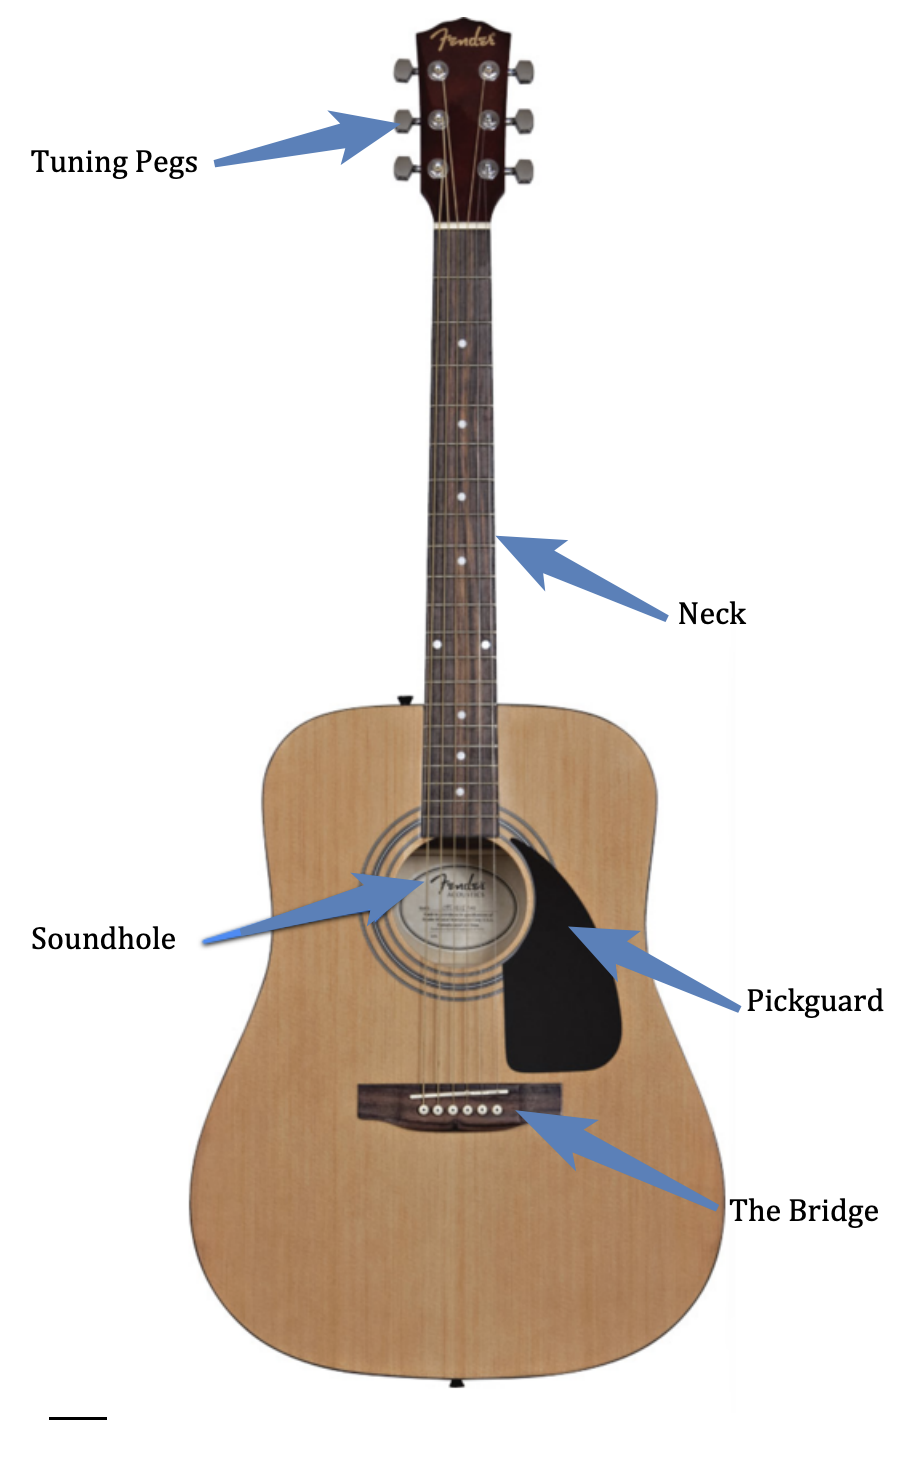
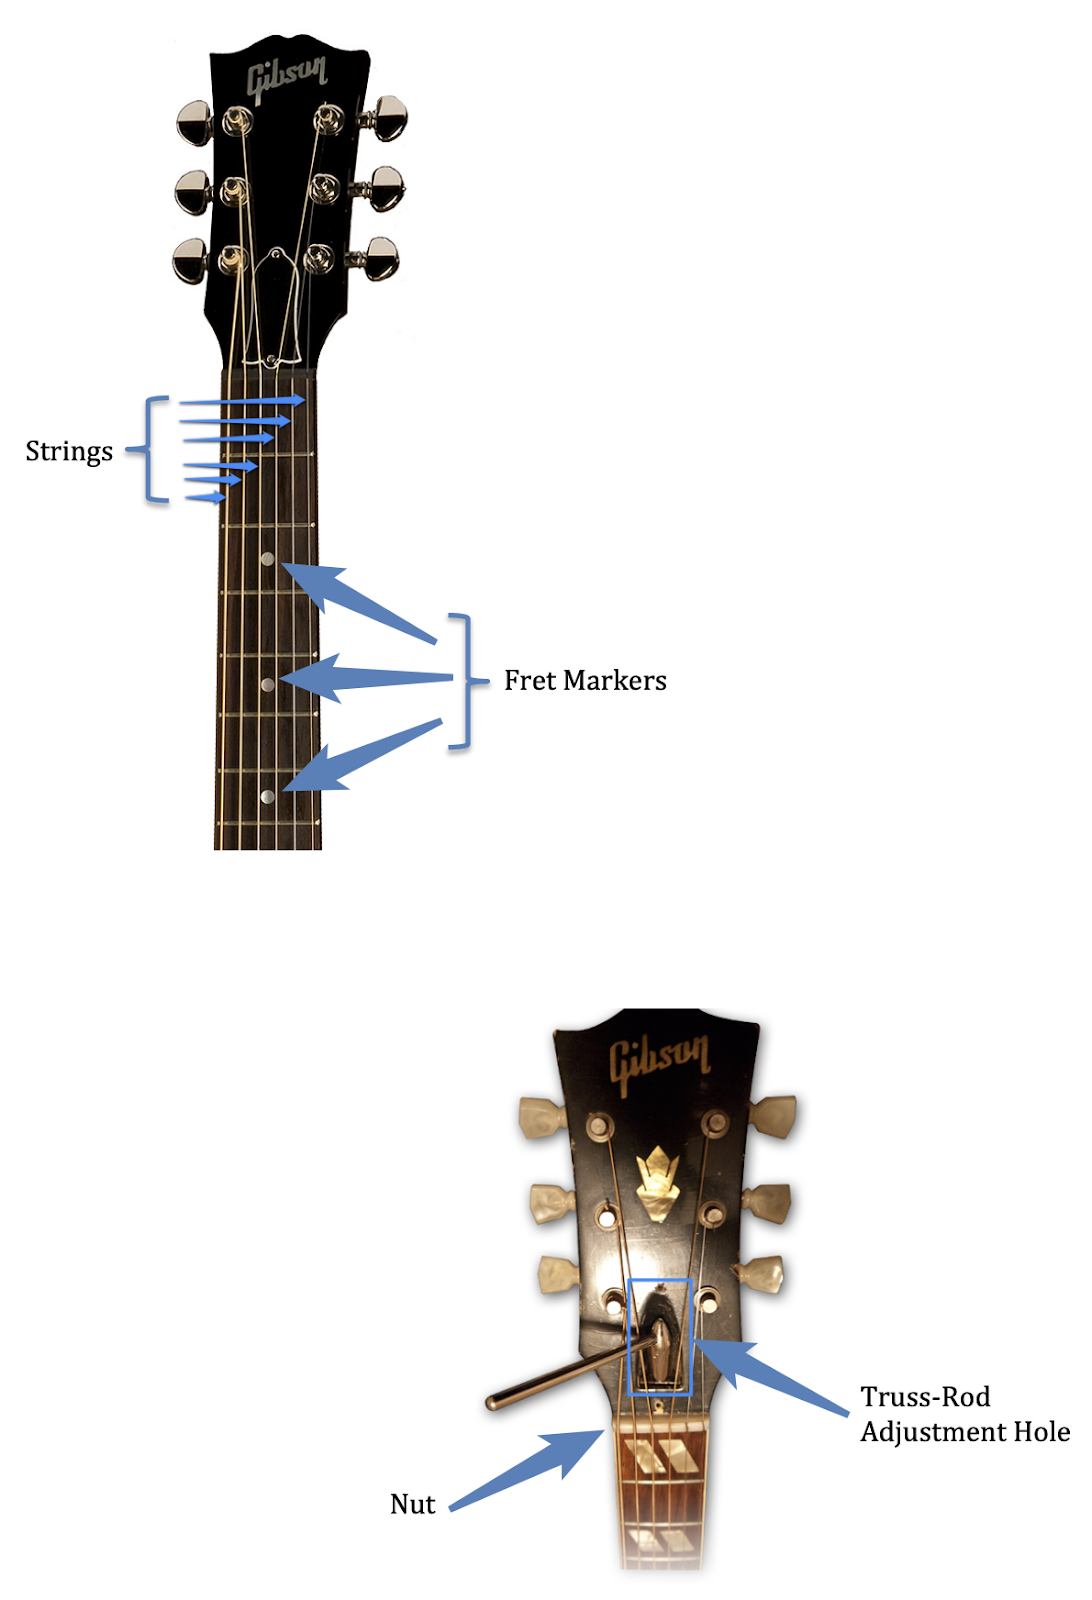
Guitar Maintenance


Change strings
Tools Needed
- New strings (correct gauge for your guitar)
- String winder (optional, but speeds up the process)
- Wire cutters
- Tuner
Step 1: Remove Old Strings
- Loosen the strings: Use a string winder or your hands to turn the tuning peg counterclockwise until the string is slack.
- Unwind and remove: Carefully unwind the string from the tuning peg and remove it from the bridge. For acoustic guitars, pull out the bridge pins; for electric guitars, thread the string through the bridge or tremolo.
- Discard safely: Old strings can be sharp, so coil them up and dispose of them properly.
Step 2: Prepare the New Strings
- Unpack and straighten: Take out the new string and lightly straighten it to avoid kinks.
- Insert the string into the bridge:
- For acoustic guitars, push the ball end into the bridge and secure it with the bridge pin.
- For electric guitars, thread the string through the back of the body or tremolo system.
- Thread the string through the tuning post: Pull it taut but leave some slack for winding.
Step 3: Wind the String
- Create a lock:
- Bend the string around itself on the tuning post to secure it.
- Ensure the windings coil neatly downward without overlapping.
- Tighten the string: Use the tuner peg to bring the string up to tension while ensuring the string winds smoothly around the post.
- Stretch the string: Pull gently on the string to stretch it and prevent future detuning. Retighten as necessary.
Step 4: Tune and Trim
- Tune the string: Use a tuner to bring the string up to pitch.
- Trim excess string: Cut the extra string length close to the tuning peg with wire cutters.
- Repeat for each string: Follow the same process for the remaining strings.
Final Step: Check and Adjust
- Tune all strings: Once all strings are installed, retune as they settle.
- Play and stretch: Play the guitar for a bit and do some bends to help the strings settle.
- Fine-tune again: Finalize the tuning for each string.
Extra maintenance between step 1 & 2
1. Clean the Fretboard
- Remove grime: Use a soft, damp cloth or a specialized fretboard cleaner to wipe down the fretboard.
- Deep clean: If the fretboard is particularly dirty, use fine-grade steel wool (0000) to gently clean the frets and wood. Cover pickups with tape on electric guitars to avoid debris sticking to magnets.
2. Condition the Fretboard (for unfinished wood like rosewood or ebony)
- Apply a small amount of fretboard conditioner (like lemon oil) to prevent drying and cracking.
- Wipe off excess with a clean, dry cloth.
3. Lubricate Moving Parts
- Tuning pegs: Apply a tiny bit of lubricant (e.g., Vaseline or specialized guitar lubricant) to the gears for smoother tuning.
- Nut slots: Use Vaseline and dental floss:
- Run the floss through each nut slot to clean out debris.
- Apply a small dab of Vaseline to the slots for smoother string movement, reducing friction and preventing string breakage during tuning or bending.
4. Check and Tighten Hardware
- Bridge screws: Ensure the bridge and saddle screws are secure, but don’t overtighten.
- Tuning pegs: Check that the tuning pegs are firmly attached to the headstock.
- Strap buttons: Tighten loose strap buttons to avoid accidents while playing.
5. Polish the Body
- Use a guitar-safe polish and a microfiber cloth to clean and shine the body, removing fingerprints and smudges.
Know the cleaner
Lemon Oil
- Purpose:
- Used to condition and protect unfinished fretboards (like rosewood or ebony).
- Helps prevent drying and cracking of the wood over time.
- Removes dirt and grime that accumulate on the fretboard.
- When to Use:
- During string changes, especially if the fretboard looks dry or feels rough.
- Typically applied 2-3 times a year, depending on how often you play and the climate (drier climates may require more frequent conditioning).
- How to Use:
- Apply a small amount of lemon oil to a soft cloth or directly onto the fretboard.
- Rub it into the wood, ensuring even coverage.
- Wipe off any excess with a clean, dry cloth.
Guitar Polish & Cleaner
- Purpose:
- Polish the guitar’s body to maintain its shine and remove smudges, fingerprints, and light scratches.
- Some formulas include a cleaner to remove dirt and dust without damaging the finish.
- Keeps the guitar looking new and vibrant while protecting its finish.
- When to Use:
- Anytime the guitar’s body shows smudges or fingerprints.
- Especially useful after performances or long practice sessions.
- How to Use:
- Spray a small amount onto a microfiber cloth or directly onto the guitar’s body (if safe for your guitar’s finish).
- Gently wipe the surface in circular motions.
- Buff the surface to a shine using a dry part of the cloth.